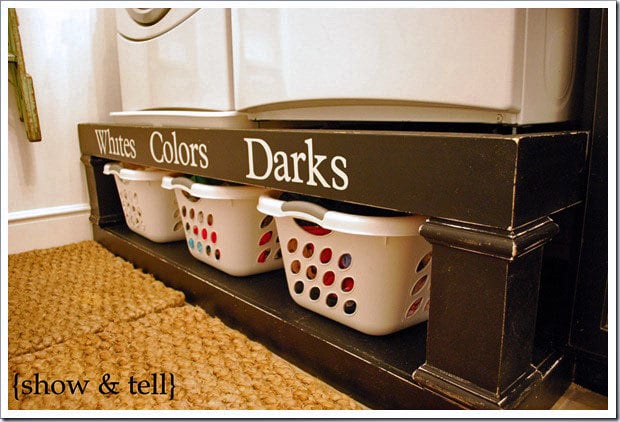
When I first caved to the cool-kid peer pressure and ventured on over to pinterest.com, one of the first things that caught my eye was this gorgeous laundry pedestal.
 |
| See lots more amazing stuff at the Show & Tell blog! |
1) I have since become a Pinterest addict.
2) Love, LOVE this laundry pedestal.
3) Free plans? This is what it so great about the internet- people sharing things for free.Thank you, Ana White!
4) Don't I have those exact laundry baskets?
5) Honey, the gift guide says 17th anniversary should be furniture...
Remember this picture?

Well those 2x4's became my version of this pedestal.
Once we started looking at the dimensions of the plans vs. our space, it was clear that we wouldn't be able to accommodate three baskets under the washer and dryer. This bummed me out because I liked the symmetry of three, not to mention the wording. Lights and Darks kind of loses something. I tried to come up with a clever way of wording that, but decided I didn't want to just be clever. I wanted it to be functional and dividing my laundry into two baskets just wasn't going to work.
I also discovered that my existing baskets were a hair too tall.
One day I was stolling through Walmart and my eyes landed on these:

Do you see the rounded triangles of the baskets? Don't they look a bit like the doors on the washer and dryer?

I painted all the boards before my husband started cutting and assembling, one coat of primer and two coats of black semi-gloss paint. A couple ways we deviated from the original plans-
 |
| using a level to help locate the studs to screw the top on. |

We assembled the top and the bottom but didn't connect the two by screwing in the bottom to the 4x4's until I'd had a chance to distress and wax the surface. I used a palm sander and lightly hit the edges of all visible surfaces. Then I used two coats of Minwax Finishing Wax to give it more of a hand-rubbed look and help protect the painted surface.
Now it looks like this:

I have decided to steal space in a nearby linen closet to store three more baskets. My laundry gets sorted into 5 different colors each week (an entire load of pink and one of dark purple/red) so having access to 5 baskets will be the most convenient. To finish off the pedestal, I am having Scott cut out vinyl letters for me at work. The letters will be white and spell out "Chambre de Blanchisserie" which I hope is French for Laundry Room.
Unless you have a better suggestion? I'd love comments with other ideas!
No comments:
Post a Comment